


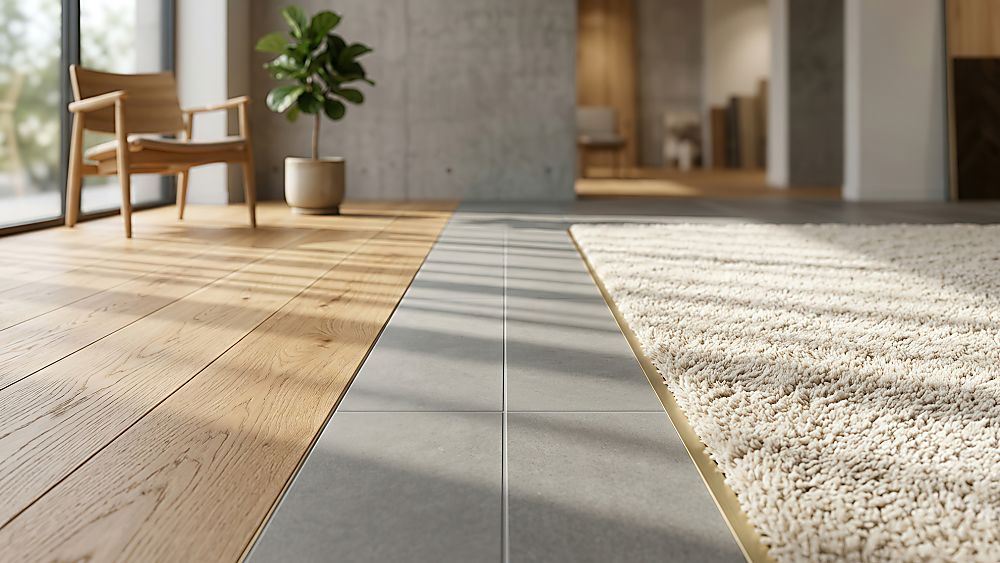
Can you pair hardwood and tile in the same open floor plan without creating awkward, clunky seams across your living space?
Yes, you can create a flush, cohesive transition between wood and tile by matching subfloor heights, using low-profile transition profiles, and planning for seasonal material movement.
Gulf Coast living brings distinct functional zones under one roof. You want the organic warmth of real wood in your main living areas, but your kitchen, foyer, and patio entryways demand the moisture resilience of hard surface tile. Blending these two surfaces smoothly gives your coastal home an open, elegant flow while protecting your investment against sand, water, and daily foot traffic.
Subfloor Preparation and Height Alignment
Subfloor preparation dictates the final surface height across both rooms. Hardwood planks and porcelain tiles possess completely different thicknesses, which means you cannot lay them down without planning their underlayment layers first.
Standard porcelain tiles measure between three-eighths of an inch and one-half inch in thickness, not including the mortar bed and uncoupling membrane beneath them.
Engineered wood planks range from one-half inch to three-quarters of an inch thick, depending on your chosen wear layer and core construction.
Concrete slab foundations in Southwest Florida homes often show subtle dips or high spots that exaggerate height gaps between adjoining rooms.
Self-leveling underlayment creates a flat plane beneath the thinner material so both finished surfaces meet on the exact same level.
Professional installers pour self-leveling compounds or adjust mortar beds to lift the substrate beneath the thinner material up to the height of the thicker material. This step ensures that once your planks and tiles rest in place, their top surfaces sit flush and eliminate accidental trip hazards.
Material Movement and Gulf Coast Humidity
Subtropical heat and coastal humidity cause flooring surfaces to react differently throughout the year. Wood planks expand when indoor humidity levels climb during rainy summer months, while ceramic and stone surfaces stay rigid.
Engineered hardwood planks resist cupping better than solid timber across Southwest Florida climate cycles.
Perimeter expansion joints give wood space to expand naturally without buckling against immovable ceramic edges.
Flexible silicone sealant fills the boundary channel, sealing out gritty sand while flexing under seasonal wood movement.
Rigid cement grout cracks quickly when forced against expanding wood planks, making elastomeric caulking essential along every transition line.
Leaving a dedicated expansion gap protects your installation against seasonal shifts. You need a clean expansion joint between the wood edge and the tile edge, filled with an elastomeric compound or capped with an engineered profile. Flexible, color-matched silicone provides a water-resistant seal that stretches and compresses as the seasons change, keeping fine beach sand out of the joint while allowing the wood to move naturally.
Transition Styles and Hardware Profiles
Specific transition methods bridge the boundary between your kitchen tile and adjoining living room wood. The right approach depends on your interior design aesthetic and the layout of your home.
Slim Metal Profiles
Minimalist metal transition strips offer a sleek border between materials. Profiles made from brushed brass, matte black aluminum, or satin nickel create a crisp line that sits flush with both surfaces. These profiles anchor securely into the setting mortar under your tile, holding an L-shaped or T-shaped cap over the expansion space. The metal edge protects the cut rim of the stone from chipping while masking the seasonal movement of your wood edge.
Flush Wood Trim and Thresholds
Custom wood reducers or flat threshold boards deliver a traditional transition across wide door spans. Installers shape matching wood stock into a low-profile threshold that aligns with the grain of your adjoining living room. This method works well in classic coastal estates across Bonita Springs and Naples, where wider architectural entryways separate formal dining rooms from stone-tiled culinary spaces.
Curved and Freeform Borders
Curved transition cuts bring artistic movement to open-concept floor plans. Rather than drawing a straight division between the kitchen island and the living room seating area, installers cut hexagonal or large-format tiles into organic contours that interlock with incoming hardwood planks. This technique requires expert saw work and meticulous subfloor leveling, but the visual result establishes designated zones without closing off natural light.
Design Harmony Between Wood Tones and Tile Textures
Coordinating colors and textures prevents visual competition between adjacent rooms. When wood and tile meet in open sightlines, the two surfaces should complement one another through intentional contrast or shared undertones.
Large-format gray stone or marble-look porcelain pairs naturally with wide-plank white oak finished in a neutral, pale stain.
Warm travertine and limestone textures match beautifully with honey-toned pecan or natural walnut in traditional Cape Coral estates.
Low-luster satin or matte sheens across both surfaces prevent glare from washing out your floor colors under bright Florida sunlight.
Interlocking plank layouts anchor the eye, while soft grout tones allow the natural wood grain to take center stage.
Surface sheens also matter when tying rooms together. A high-gloss porcelain tile positioned next to a wire-brushed, ultra-matte hardwood floor can look disconnected. Opting for satin or matte finishes on both surfaces maintains a balanced, unified look under bright Southwest Florida sunlight.
Room-by-Room Transition Strategies
Specific living areas require distinct planning based on foot traffic, water exposure, and daily routines.
Foyer and Entryway Foyers
Main entryways handle wet shoes and tracked-in beach sand from coastal outings. Insetting a durable tile pattern directly inside your front door creates a designated landing zone that shields your home from debris. Running hardwood planks around the perimeter of this tile field establishes an elegant border, keeping the high-impact zone protected with easy-to-clean tile while letting warm wood lead guests into the rest of the home.
Kitchen and Great Room Borders
Kitchen boundaries must endure spills, grease splatters, and heavy foot traffic around islands and cooking ranges. Placing tile beneath food prep zones and transitioning to hardwood where seating begins keeps maintenance practical. Align the transition line with an architectural anchor, such as the edge of an island, the end of a cabinet bank, or an overhead ceiling beam, so the material shift feels deliberate rather than accidental.
Patio and Lanai Sliders
Sliding glass doors leading to your outdoor lanai bring intense moisture, pool water, and strong afternoon sun. Placing a transitional band of slip-resistant tile along the interior side of your sliding doors protects your living room hardwood from sudden rain intrusion or wet feet returning from the pool.
Connect Your Spaces with Smart Floors
Why guess how materials will look under your lighting when you can see them right where they live? Our Mobile Showroom brings hundreds of curated hardwood planks and artisan tile samples straight to your front door, letting you match tones against your cabinets and coastal sunlight in real time. Prefer an in-person stroll? Stop by our Bonita Springs or Cape Coral showrooms to explore full displays. Contact Smart Floors today to schedule your private design consultation and give your floors the flawless connection they deserve.


